Your Guide to Filling Cremation Jewellery With Urns For Ashes
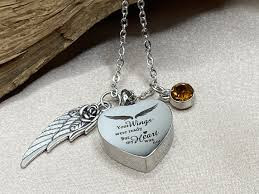
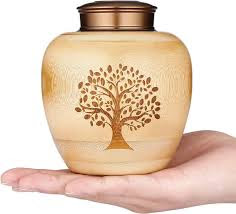
Cremation jewellery serves as a beautiful and meaningful way to keep a loved one close even after they have passed away. These pieces are designed to hold a small portion of cremated ashes allowing you to carry a part of your loved one with you always. While the idea of filling cremation jewellery with The Urns For ashes might seem daunting at first it is a relatively simple process that can be done at home with a few tools and a bit of patience. This guide will walk you through the steps to ensure you do it safely and respectfully.
Materials Needed
Cremation jewellery: A pendant, bracelet, ring, or other item designed to hold ashes.
Filling kit: Most cremation jewellery comes with a small funnel, a tiny spoon or scoop, and a toothpick or pin.
Adhesive: A strong adhesive or epoxy to seal the jewellery.
Protective surface: A tray or cloth to work over, in case of spills.
Paper towel: For cleanup and to handle the jewellery.
1. Prepare Your Workspace
Choose a clean, flat surface to work on. Lay down a protective cloth or tray to catch any spilled ashes. Ensure that you have all your tools and materials at hand before you begin.
2. Open the Jewellery
Carefully open the compartment of the cremation jewellery. Depending on the design, this might involve unscrewing a small screw or removing a tiny plug. Keep these small parts in a safe place where they won’t be lost.
3. Prepare the Ashes
Using the provided spoon or scoop, gently transfer a small amount of ashes into the funnel. It’s advisable to start with a small amount and add more as needed, to avoid overfilling.
4. Fill the Jewellery
Insert the funnel into the opening of the jewellery. Slowly and carefully pour the ashes through the funnel into the compartment. You might need to use the toothpick or pin to gently coax the ashes through the funnel and into the jewellery Urns For Ashes. Be patient and avoid rushing this step to prevent spills.
5. Seal the Jewellery
Once the compartment is filled, it’s time to seal it. Apply a small amount of adhesive to the screw or plug before securing it back into place. This will ensure that the ashes remain safely inside. Wipe away any excess adhesive.
6. Clean Up
Carefully clean up your workspace, making sure to handle any spilled ashes with respect. If necessary, use a damp cloth to wipe down the jewellery and remove any adhesive residue.
7. Wear or Store Your Jewellery
Your cremation jewellery is now ready to be worn or stored. If you plan to wear it, check the seal occasionally to ensure it remains secure. If you’re storing the jewellery, keep it in a safe, dry place.
Tips for SuccessTake your time: The process of filling cremation jewellery is delicate and requires patience.
Use a quiet space: Choose a time and place where you won’t be disturbed, allowing you to focus fully on the task.
Ask for help if needed: If you’re uncomfortable handling the ashes yourself, many funeral homes offer services to fill cremation jewellery for you.
Conclusion
Filling cremation jewellery with ashes is a touching way to create a lasting memory of your loved one. By following these steps, you can ensure that the process is done with care and respect, resulting in a cherished keepsake that holds a special place in your heart.


%20(1).jpeg)


Comments
Post a Comment